Getting Started With Anki
In the last lesson, we talked about the importance of the SRS for learning quickly and, more importantly, remembering what we learned. In this lesson, we'll talk about how to get started using Anki to rapidly improve your English vocabulary.
Anki is pronounced like "ong-key" with the same ending as "song". To be honest, even though Anki is an extremely useful tool, it's not a pretty program. The user interface is not very nice to look at, and it's too complex. Anki has many options, which makes it confusing for new users.
In the future, I may create a simpler version of Anki on English Tea Break, but for now, I'll just help you understand the important parts of Anki, so you can ignore the rest.
Anki has 4 main components, which you'll learn in this order:
- Setup (we'll talk about that in this lesson)
- Creating templates
- Creating cards
- Studying
Before starting the setup process, let's take a moment to define some basic Anki terminology.
| Anki Term | Description |
|---|---|
| Deck | A deck is a collection of cards related to a certain topic. You'll be making an English deck to study English vocabulary. As another example, a medical student might make an anatomy deck. |
| Cards | A card is the thing that you see when you're studying. The front of the card will have an English sentence, and the back of the card will have the same sentence in your own language. You'll read the front of the card and try to remember the meaning of the sentence. |
| Add-on | These are plugins that add additional features to Anki. |
| Preset | A group of settings that can be used on multiple decks. |
Important Disclaimer
As I said, the core goal of an SRS is simple, but Anki is complex. The goal of SRS programs is to show you a card right before you forget, so your brain will strengthen its connection to that vocabulary word. It's the "right before you forget" part that can be influenced with adjustments to a lot of different settings in Anki.
You can learn about Anki's algorithm on GitHub or on YouTube, but I recommend that you don't research that stuff too much. It's a lot of information. Learning how it all works takes a long time, but only improves your results by a little. I'll teach you how to get 99% of the benefits from Anki in a short period of time.
It's better to spend your time studying rather than researching ways to optimize your studying.
Anki Setup
If you haven't downloaded Anki yet, you can download it here.
You can change Anki to use your own language (Tools -> Preferences -> Language). I would recommend using English so you can understand my instructions, but if you get confused, switching Anki to your own language temporarily could be useful.
After downloading and installing the program, there's one more thing you'll need before you start using Anki. So let's install an Anki add-on.
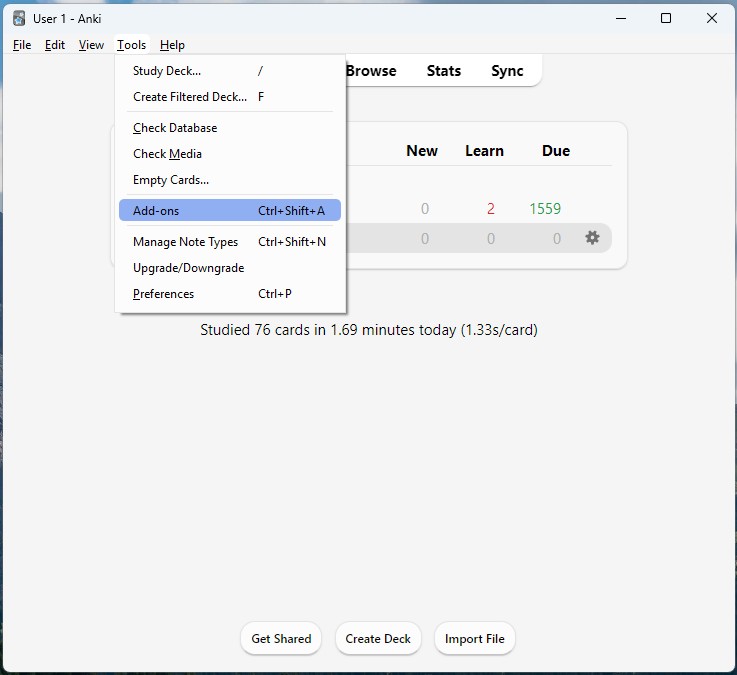
When you open Anki, in the top navigation bar, go to Tools and then Add-ons.
Then, click the "Get Add-ons..."" button.
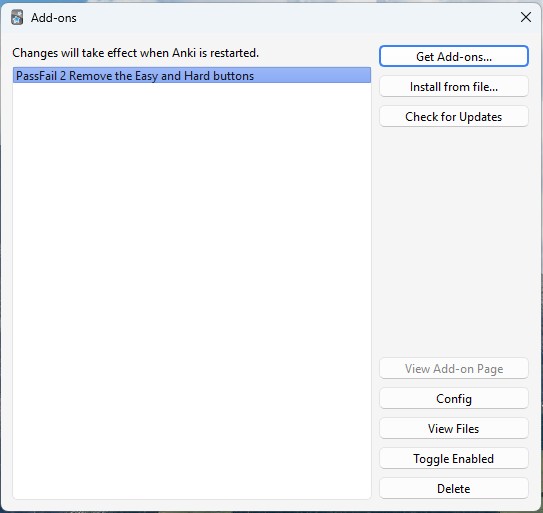
In the box that pops up, you'll paste this code: 876946123 and then click OK. This will download the "PassFail 2 Remove the Easy and Hard buttons" add-on. After installing the add-on, close and open Anki again so the new add-on will start working.
As the name suggests, this add-on removes the Easy and Hard buttons from Anki. Originally, when you see a card on Anki, you have four options: Again (if you failed the card), Easy (you easily remembered the card), Good (you remembered the card), and Hard (you remembered the card but it was difficult). We want to simplify Anki by only showing a button for Pass and a button for Fail. Either you remembered the card or you did not. This will be easier for you to use, and studies have shown that Anki's algorithm performs better when the other two buttons are not used.
NOTE: The word "pass" in English has a lot of meanings. In this case, pass means you succeeded.
Don't worry if that doesn't make sense right now. We'll talk a lot more about how to study Anki cards in an upcoming lesson.
Anki's Main Window
Now that the add-on has been...added on, let's take a moment first to familiarize you with Anki a little more. Then, my instructions will make more sense when we start building a deck.
This is Anki's main window. We're going to talk briefly about each tab in the white navigation bar. Right now, I'm looking at the Decks tab.
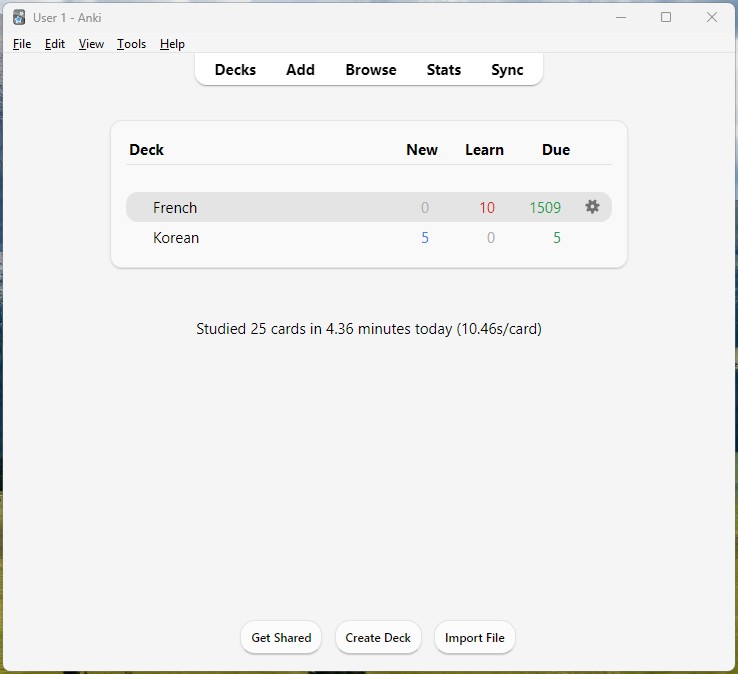
- Decks - You can see your decks here (we'll create an English deck for you next) and make changes to your deck settings.
- Add - This is where you'll create new cards to study.
- Browse - This is where you can see all the cards you've created.
- Stats - This shows a bunch of charts and graphs that will help you monitor your progress.
- Sync - Clicking this will sync your local Anki cards, data, and settings to the Anki cloud. You will need to make an Anki account for this to work. It's not necessary, but if you ever want to study from your phone, it's a nice option. Personally, I prefer to use my computer.
Create an English Deck
Okay! It's time to create an Anki deck for studying English. I'll show you the Anki settings that I found to be optimal for learning languages.
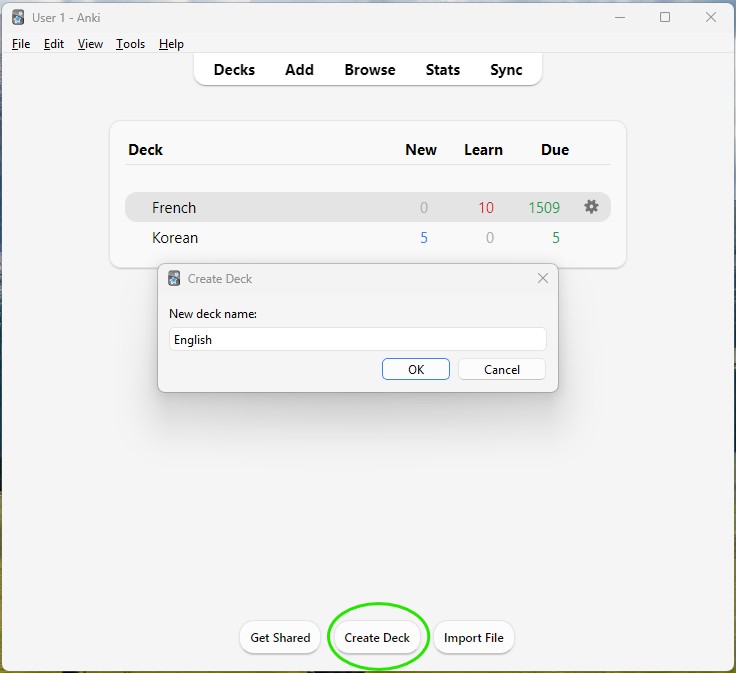
From the Decks tab on the main window, click on Create Deck and name it "English".
Next, there are a few settings we're going to change for this deck. We're getting into the complex part now. I won't explain every setting in detail, but I'll help you to understand the important ones.
Start by creating a preset. This is a deck template that can be used across multiple decks, if you're learning English and French, for example. Next to the Save button, there's a little arrow pointing down. Click that, then Add Preset, and name it "Language".
Now we'll adjust some settings for the new preset. Remember, the point is to learn vocabulary, not to learn every Anki setting. We'll quickly prepare our deck settings, so we can move on.
Daily Limits
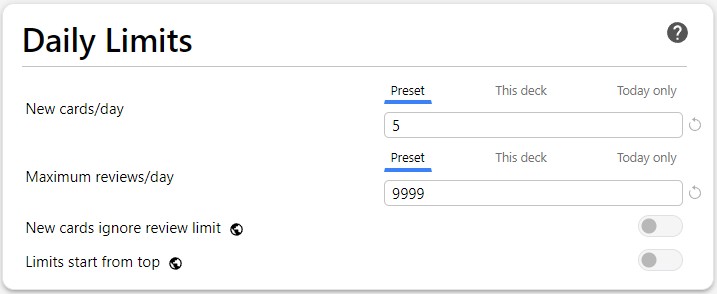
Set New cards/day to 5. You'll see 5 new cards per day. This is a good place to start. You could increase it to 10, but be careful. This setting can drastically increase the amount of Anki studying that you have to do each day. If you want to learn English vocabulary faster, add 5 and then try that for two weeks. If you can still handle the increased workload and want to learn faster, you can add 5 again after that.
Maximum reviews/day is the maximum number of old cards you'll see in a day. By setting this to 9999, we ensure that all cards needed to be studied are actually studied. Don't worry, you'll never have study that much in one day.
The other two toggle settings for New cards ignore review limits and Limits start from top can remain turned off.
New Cards
These are settings for cards that you haven't studied yet.
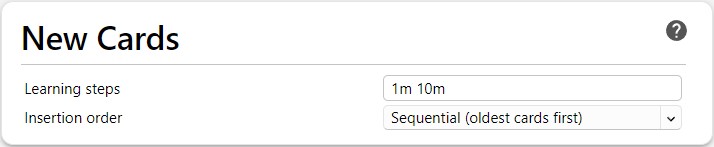
Learning steps is an important setting related to our short-term memory. By choosing "1m 10m", it means that if you fail a new card (which will happen almost every time because we're learning new vocabulary), you'll see the card again in 1 minute. If you pass the card, you'll see it again in 10 minutes. Ten minutes later, if you pass that card again, the card will stop being considered a "New Card". It will be a "Review Card" the next time you see it. The algorithm will determine the best time to show each review card again.
Leave Insertion order as "Sequential (oldest cards first)".
Lapses
These settings are related to Review Cards that you have forgotten.
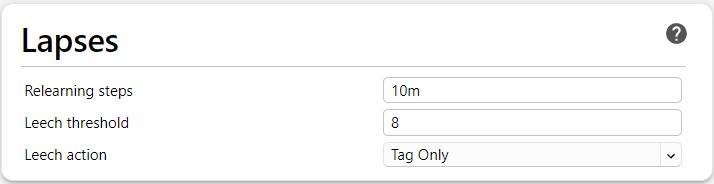
Set Relearning steps to "10m". This means that if you failed a card that you learned already—a review card—you should be able to remember it if you see it again in 10 minutes. New cards need more practice, but relearning something that you used to know is easier.
For the Leech threshold, choose a number between 5 and 8. A "leech" is what Anki calls a card that you've forgotten many times. In my case, if I fail a review card 8 times, Anki will define it as a leech.
Leech action is "Tag Only". This sets a tag of "Leech" on the card, which makes it easy to find in your Browse tab later. Leech cards should be redesigned to help you remember them more easily. We'll talk about how to design good cards in the next lesson.
Display Order
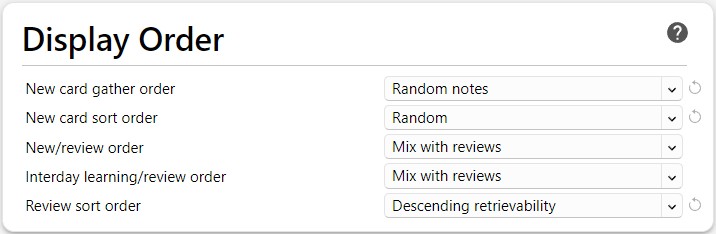
New card gather order should be "random notes". We choose this so that the cards that we most recently created are not the same ones shown to us the next day.
New card sort order should be "random".
New/review order and Interday learning/review order should be "mix with reviews". This means that you won't see only new cards first, followed by the review cards. You'll see them mixed together.
Review sort order should be "descending retrievability". If you ever take a long break from Anki and get a large backlog (like me with my French deck 😭), this will help you get back on track.
FSRS
This is the algorithm that shows you cards right before you forget them. It's the "brain" of the Anki program.

First, turn on FSRS with the toggle switch.
Set Desired retention to something between 80% and 90%. I chose 90% meaning that I want to have a 90% chance of remembering a review card when I see it. Higher numbers mean a lot more studying, so 80-90% is a range for getting great results without too much work.
The FSRS parameters affect the math of the algorithm. You don't need to know the details of how these work.
The next line shows "preset:"Default" -is:suspended". You can leave this as is.
Reschedule cards on change should be turned off.
Check health when optimizing (slow) can be on, but turn it off if the next step is slow, which might happen when you have thousands of cards.
Click on the Optimize Current Preset button now. It might make you save your changes to the deck preset first, and if you've never used Anki before, this button probably won't do anything at all. However, I want you to remember this button. As you continue to use Anki, the algorithm will learn how you behave with the Pass/Fail buttons, and it will learn how your memory works.
You should press this Optimize Current Preset button once a month in order to optimize the FSRS parameters. This will help Anki to help you learn more efficiently.
You can ignore the Optimize All Presets button and the FSRS simulator (experimental) button.
Burying, Audio, and Timers
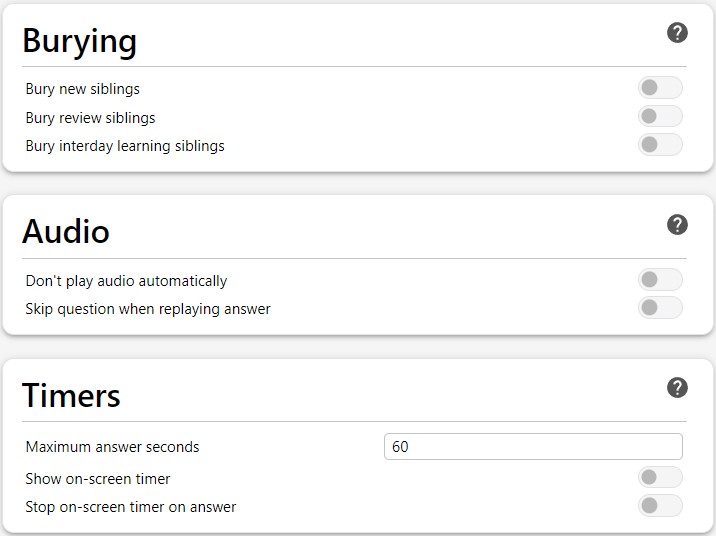
You can leave all of these toggle settings turned off.
Under Timers, for the Maximum answer seconds setting, choose a number between 30 and 60. This affects some stats, but it isn't very important.
Auto Advance and Easy Days
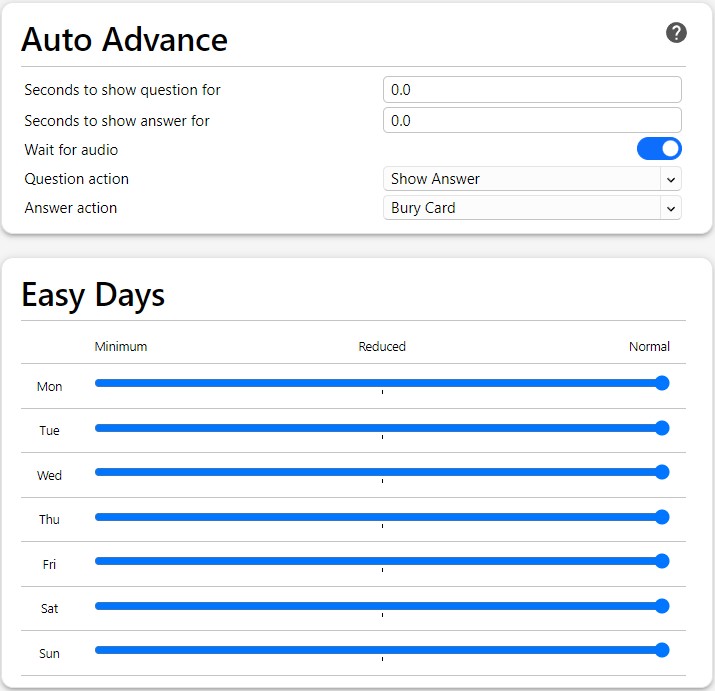
I didn't change any of these settings. We won't be using the Auto Advance feature, so those settings don't matter for us.
For Easy Days, you can tell Anki that you want to do fewer reviews on certain days of the week. For us, Anki study should only take about 15-20 minutes a day, so it's unlikely that these settings will be needed.
Don't Forget to Save
That's it! You can ignore the Advanced section of settings.
You've now created an efficient English deck for Anki, which will hold all of your English vocabulary study cards. Don't forget to hit the Save button in the top-right!
In the next lesson, we're going to build a card template which is necessary changing the look of our Anki cards.