Anki Card Templates
Now that Anki has been set up and we've created a deck, the next step is to prepare a template for our cards. A template is an empty frame for your cards. It's a pattern or model that tells Anki how your cards will look and where the information will go.
When you create new cards in Anki, you can choose from several templates, but we're going to make our own. Here's what it will look like:
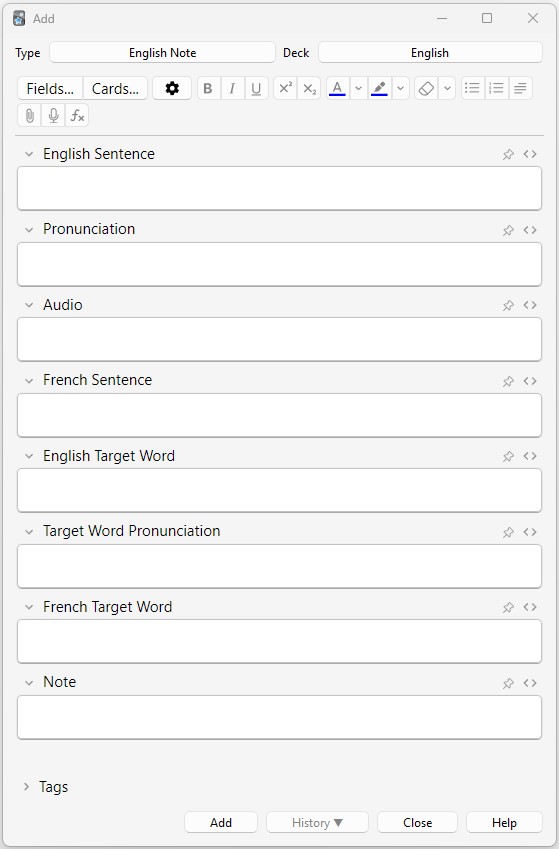
We'll have textboxes—these are the white boxes where you type in information—for these Fields (we'll talk more about Fields in a moment):
- English Sentence
- Pronunciation
- Audio
- [Your Native Language] Sentence — For example, if your first language is Hindi, your textbox will say "Hindi Sentence".
- English Target Word
- Target Word Pronunciation — Optional, I'll explain in the Adjust "Fields..." section below
- [Your Native Language] Target Word
- Note
Create a Note Type
To start creating your Anki templates, on the main window, click the "Add" button or press the "A" key.
1. First, make sure your Deck is using the deck that you created in the last lesson.
2. After selecting your English deck, click on the "Type" button. See the screenshot above, and click where mine says "English Note".
3. This will open a new window that says Choose Note Type. In this window, click the "Manage" button at the bottom.
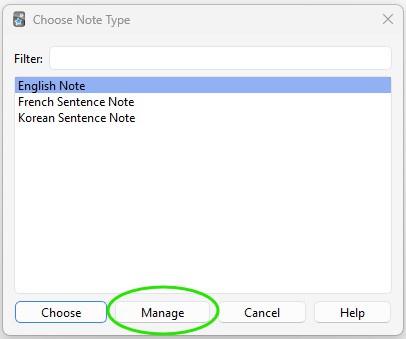
4. Another new window will appear. This one is titled Note Types. Click the "Add" button.
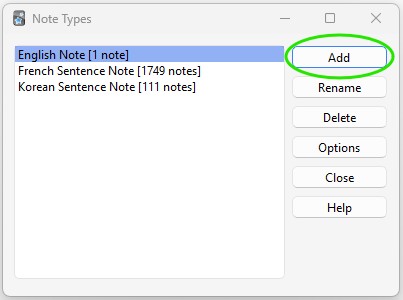
5. Then another new window will appear (yes, there are a lot!) with the name Add Note Type. Here, you'll select the "Add: Basic" type and then press "OK".
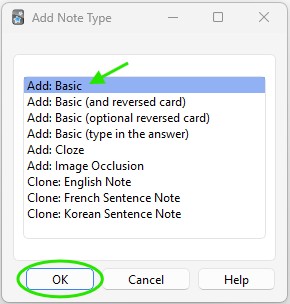
6. One more window will open that will allow you to enter a name for the new note type. Type in "English Note" and then press "OK".
Now a new note type has been created! You can delete the other ones if you want. You'll only need the English Note that you just made.
Finally, close all of the other windows, but keep the "Add" window open (the one from my first screenshot). Make sure the Type is "English Note" and the Deck is "English". Then, you're ready for the next step.
Adjust "Fields..."
Now, you have a new note type, but the fields (the textboxes) just say Front and Back. We need to adjust these, so click on the "Fields..." button beneath the "Type" button.
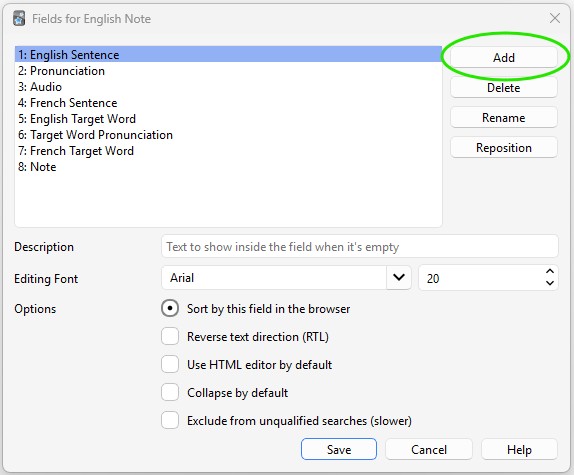
1. In the new window titled Fields for English Note, click the "Add" button and create all of the fields shown in the screenshot below:
NOTE: You don't need #6 Target Word Pronunciation if your native language uses the same alphabet as English (like Spanish, German, French, etc.).
Remember, instead of "French Sentence" and "French Target Word", write the name of your own native language. For example, use "Korean Sentence" and "Korean Target Word" if your native language is Korean.
2. After you've added all of the new fields, you can delete the "Front" and "Back" fields that had originally been created.
3. Click the "Save" button, and you'll be ready for the next step!
Adjust "Cards..."
At this point, you've told Anki which textboxes you want to be able to see on your cards, but you haven't told Anki how you want those textboxes to look on your study card. That will be the next step.
For this section, we'll have to work with a little bit of code, but don't worry if it looks confusing. I'll give you the code. You just need to copy and paste it into your cards.
1. Click on the Cards... button.
2. Make sure you're on the "Front Template" setting. Below the image, you can copy the code. Then, paste it into Anki like the image shows.

{{English Sentence}}

<br><br>

<div style='font-family: "Arial"; font-size:12px;'>{{Pronunciation}}</div>

<br><br>

<div style='font-family: "Arial"; font-size: 20px;'>{{Audio}}</div>
3. Now, click "Back Template" and we'll paste the next block of code in there. For this one, though, you'll need to change a piece of my code to make it work for you.
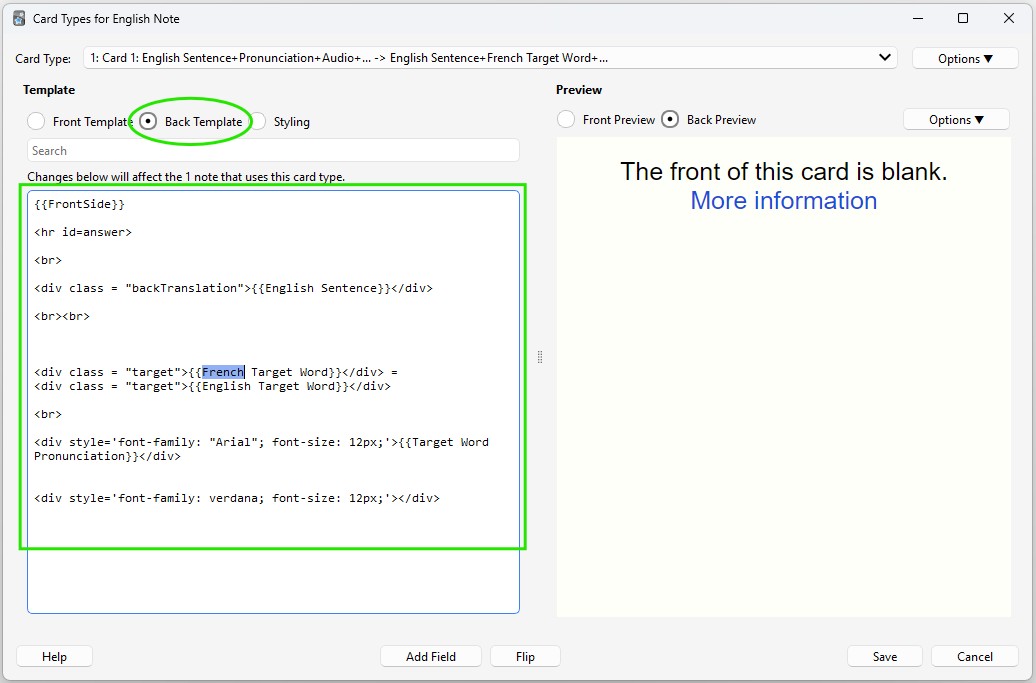
I highlighted the word "French" in the image above and also in the code below. Make sure to change that to your native language so it matches the name that you used for field #4 in the Adjust "Fields..." section.
{{FrontSide}}

<hr id="answer">

<br>

<div class="backTranslation">{{English Sentence}}</div>

<br><br>

<div class="target">{{French Target Word}}</div> =
<div class="target">{{English Target Word}}</div>

<br>

<div style='font-family: "Arial"; font-size: 12px;'>{{Target Word Pronunciation}}</div>

<div style='font-family: verdana; font-size: 12px;'></div>
4. There's just one more piece needed. Under "Styling", you'll copy and paste one more section of code. You don't have to change anything on this one.
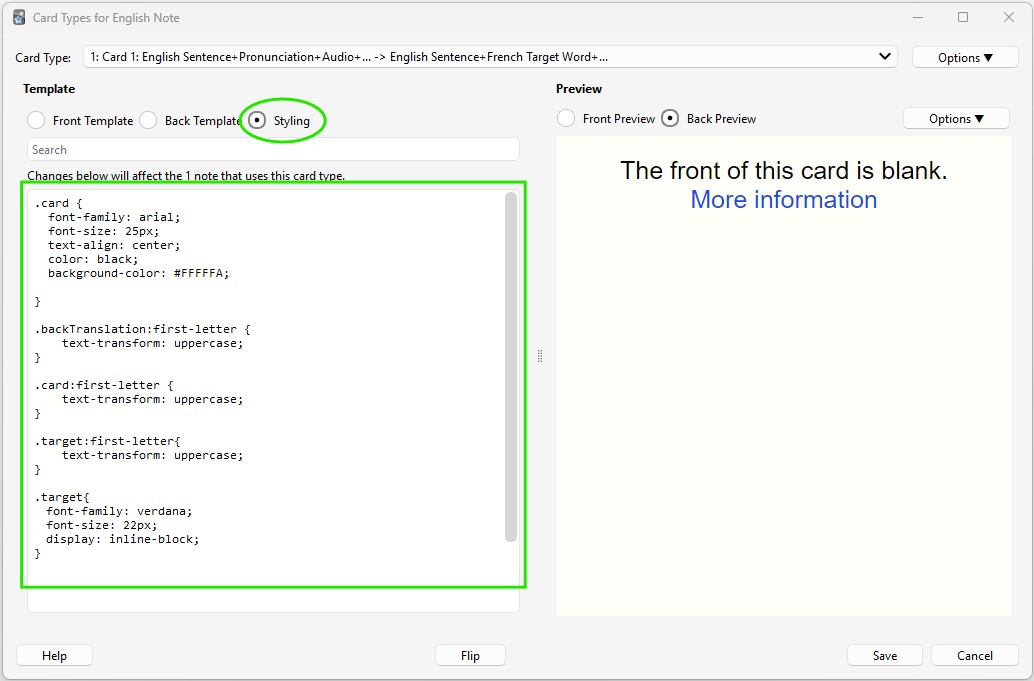
.card {
  font-family: arial;
  font-size: 25px;
  text-align: center;
  color: black;
  background-color: #FFFFFA;

}

.backTranslation:first-letter {
    text-transform: uppercase;
}

.card:first-letter {
    text-transform: uppercase;
}

.target:first-letter{
    text-transform: uppercase;
}

.target{
	font-family: verdana;
	font-size: 22px;
	display: inline-block;
}
After you've added the code for the Front Template, the Back Template, and the Styling, make sure to click the "Save" button.
Conclusion
You're done! That was the hardest part of setting up Anki.
In the last lesson, you downloaded Anki, built a deck, and changed its settings. In this lesson, you built your card templates. And now that your Anki setup is complete, you're ready to create some cards for improving your English vocabulary!
In the next lesson, we'll talk about building cards. I'll describe what all of these textboxes mean and how to use them. We'll even create some starter cards for you!